项目介绍 本文章讲解的是基于 Vue3.x 和 Springboot 的前后端分离项目的登录拦截示例。运用到 vuex 和 Springboot 的拦截器。前端采用路由守卫,后端采用注册拦截器。安全验证采用 JWT 的 token 令牌。
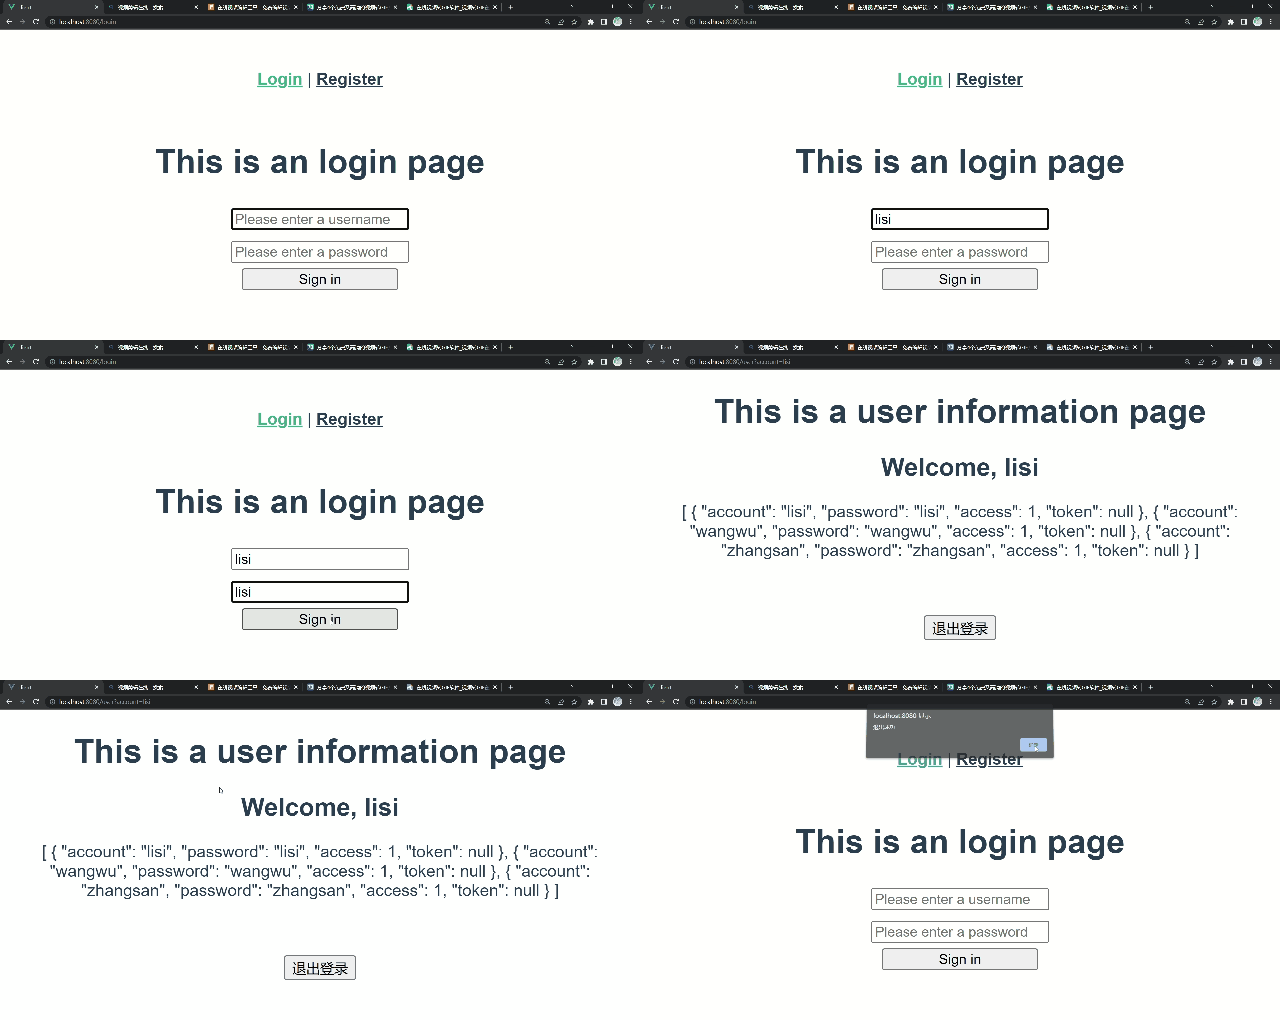
效果展示 登录成功
登录成功后弹出提示信息,并自动跳转到用户页面。
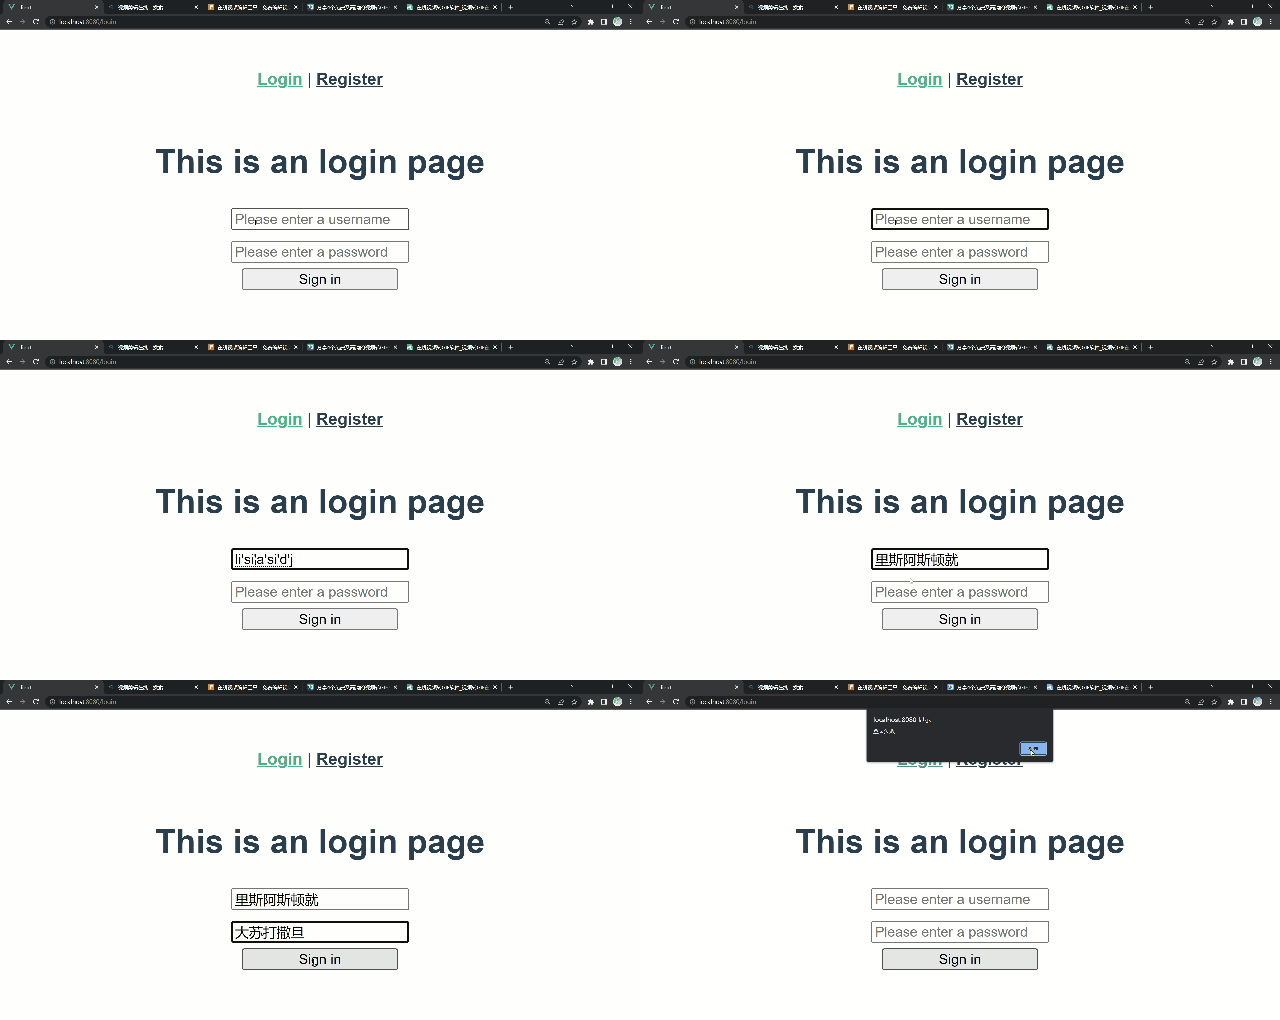
登录失败
登陆验证失败后会弹出提示信息。
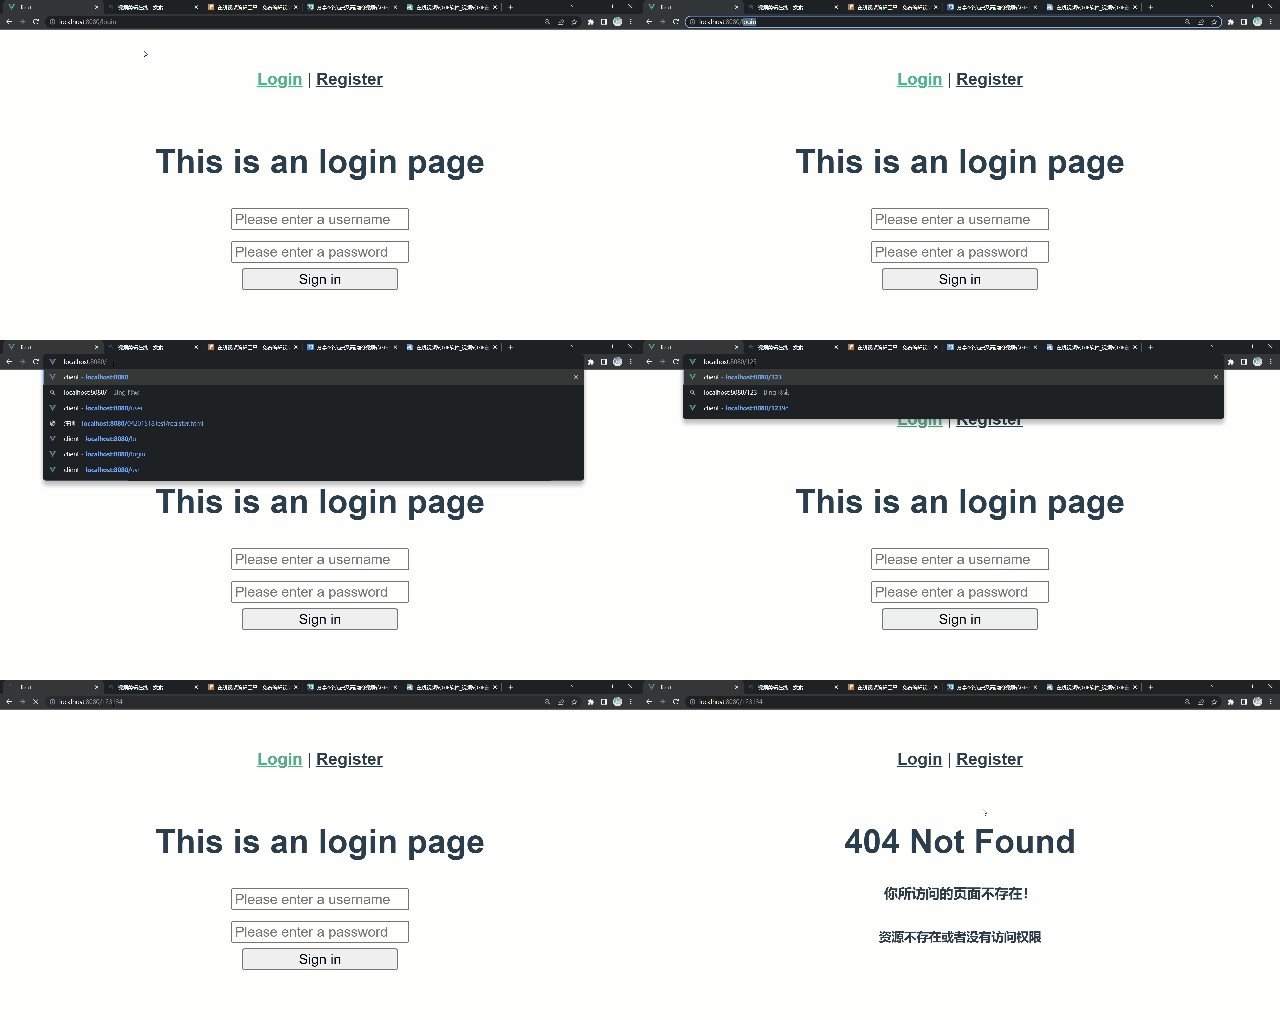
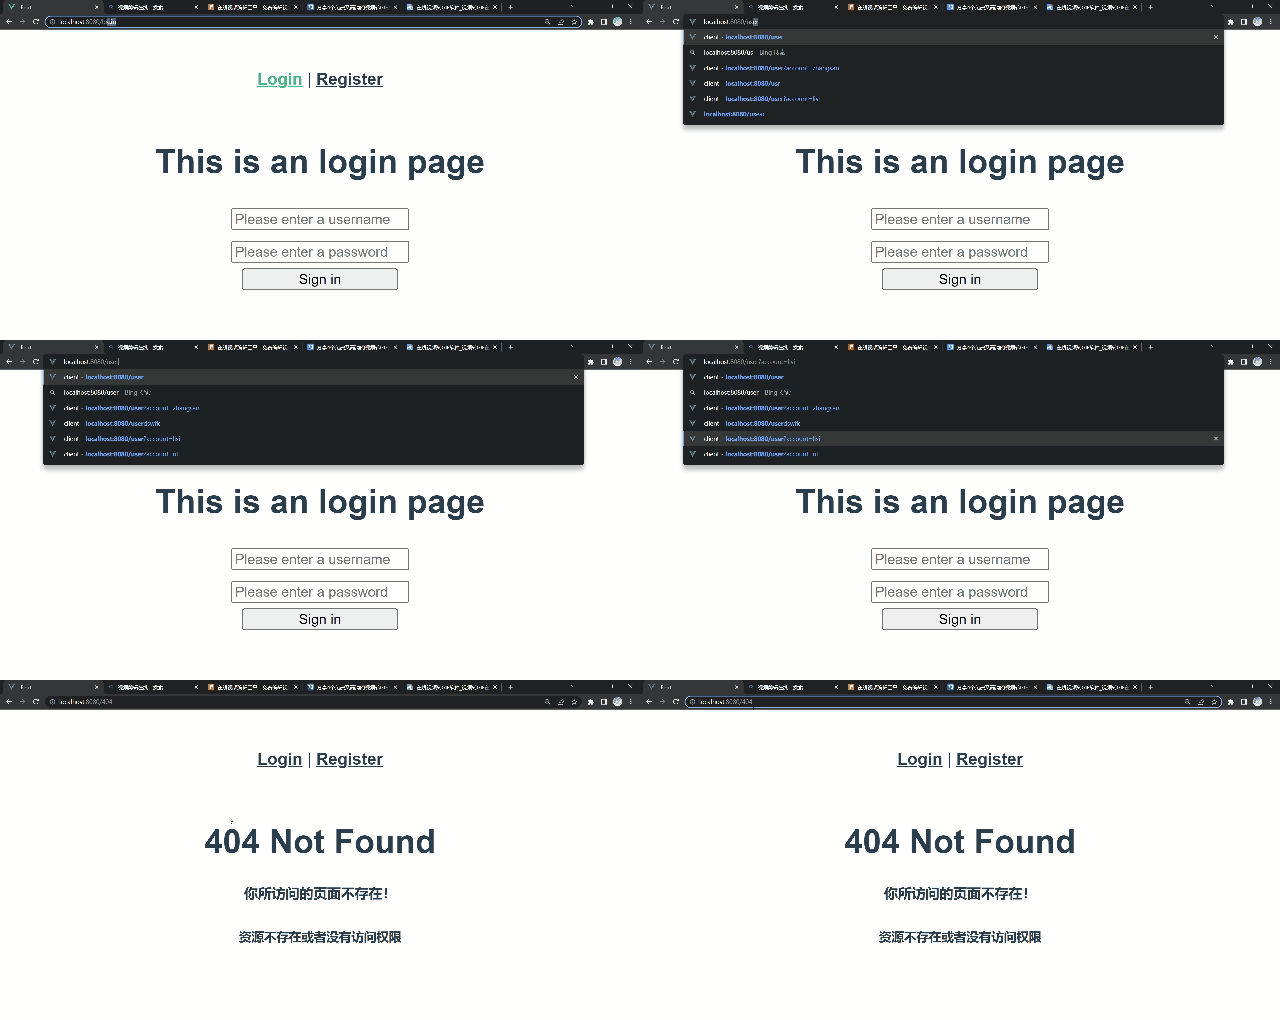
访问无效 URL
访问无效 URL 时,会自动跳转到 404 页面。
环境配置 数据库
数据库:MySql8.0.28
开发工具:Navicat Premium 15
依赖导入 1 2 3 4 5 6 7 8 9 10 11 12 13 14 15 16 17 18 19 20 21 22 23 24 25 26 27 28 29 30 31 32 33 34 35 36 37 38 39 40 41 42 43 44 45 46 47 48 49 50 51 52 53 54 55 56 57 58 59 60 61 62 63 64 65 66 <properties > <java.version > 1.8</java.version > <mysql.version > 8.0.28</mysql.version > <druid.version > 1.2.9</druid.version > <mybatis.version > 2.1.3</mybatis.version > <jwt.version > 3.10.3</jwt.version > <hutool.version > 5.7.22</hutool.version > <skipTests > true</skipTests > </properties > <dependencies > <dependency > <groupId > org.springframework.boot</groupId > <artifactId > spring-boot-starter-web</artifactId > </dependency > <dependency > <groupId > org.mybatis.spring.boot</groupId > <artifactId > mybatis-spring-boot-starter</artifactId > <version > ${mybatis.version}</version > </dependency > <dependency > <groupId > mysql</groupId > <artifactId > mysql-connector-java</artifactId > <version > ${mysql.version}</version > <scope > runtime</scope > </dependency > <dependency > <groupId > com.alibaba</groupId > <artifactId > druid</artifactId > <version > ${druid.version}</version > </dependency > <dependency > <groupId > org.springframework.boot</groupId > <artifactId > spring-boot-starter-jdbc</artifactId > </dependency > <dependency > <groupId > org.springframework.boot</groupId > <artifactId > spring-boot-starter-test</artifactId > <scope > test</scope > </dependency > <dependency > <groupId > com.auth0</groupId > <artifactId > java-jwt</artifactId > <version > ${jwt.version}</version > </dependency > <dependency > <groupId > cn.hutool</groupId > <artifactId > hutool-all</artifactId > <version > ${hutool.version}</version > </dependency > </dependencies >
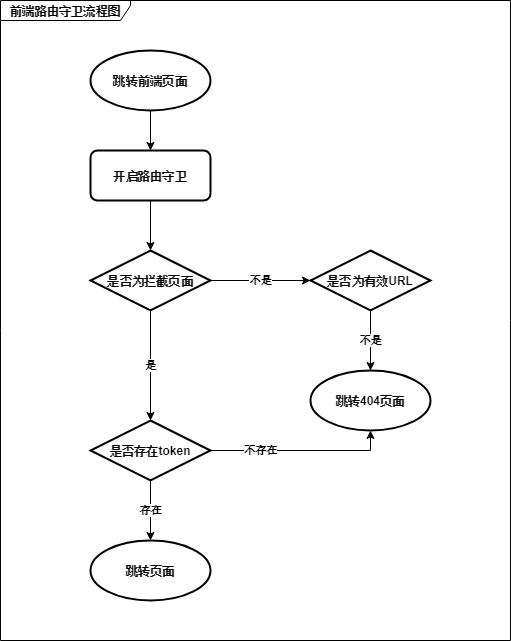
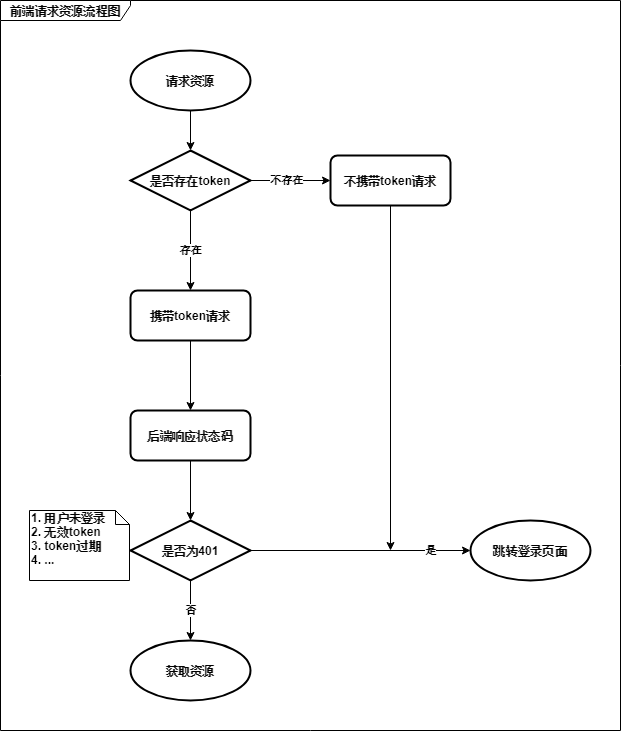
项目分析 前端实现 前端路由守卫流程图
前端请求资源流程图
路由守卫代码实现
文件路径:router/index.js
在需要拦截的页面的路由处加上 requireAuth: true。
1
2
3
4
5
6
7
8
9
{ path : '/user' , name : 'user' , component : () => import ('../views/UserInfoView.vue' ), meta : { showNav : false , requireAuth : true } }
文件路径:main.js
在页面跳转前,先判断要跳转的页面是否为拦截页面 ,若不是拦截页面 则页面放行;若是拦截页面 则判断 vuex 是否存在 token ,若不存在 token 则跳转”/404“,由于“/404”为无效 URL,所以会自动跳转到指定页面;若存在 token 则页面放行。
1 2 3 4 5 6 7 8 9 10 11 12 13 14 router.beforeEach((to, from , next ) => { if (to.meta.requireAuth) { if (store.state.user.token) { next() } else { next({ path : "404" }) } } else { next() } } )
拦截无效 URL 代码实现
文件路径:router/index.js
遇到无效 URL 跳转到指定页面。
注意:此拦截代码只对 vue3 以上有效,应当把这段代码加在路由最后。
1
2
3
4
5
{ name : 'error' , path : '/:pathMatch(.*)' , component : () => import ('../views/NotFoundView.vue' ) }
封装请求代码实现
文件路径:api/request.js
判断 sessionStorage 是否存在 token,存在则携带 token 发送请求。
判断服务器返回的状态码是否为 401,是则跳转到登录页面。
1
2
3
4
5
6
7
8
9
10
11
12
13
14
15
16
17
18
19
20
21
22
23
24
25
26
27
28
29
30
31
32
33
34
35
36
37
38
39
40
41
42
43
44
45
46
47
48
49
50
51
52
53
54
55
56
57
58
59
import axios from 'axios' import {HOST} from "../config/config" ;const request = axios.create({ baseURL : HOST, timeout : 5000 }) request.interceptors.request.use(config => config.headers['Content-Type' ] = 'application/json;charset=utf-8' ; let token = sessionStorage.getItem("user" ) ? sessionStorage.getItem("user" ) : null ; if (token) { config.headers['token' ] = token; } return config }, error => return Promise .reject(error) }); request.interceptors.response.use( response => let res = response.data; if (response.config.responseType === 'blob' ) { return res } if (typeof res === 'string' ) { res = res ? JSON .parse(res) : res } if (res.code === 401 ) { alert(res.message); window .location.replace("/login" ); } return res; }, error => console .log('err' + error) return Promise .reject(error) } ) export default request
Vuex 代码实现
文件路径:store/index.js
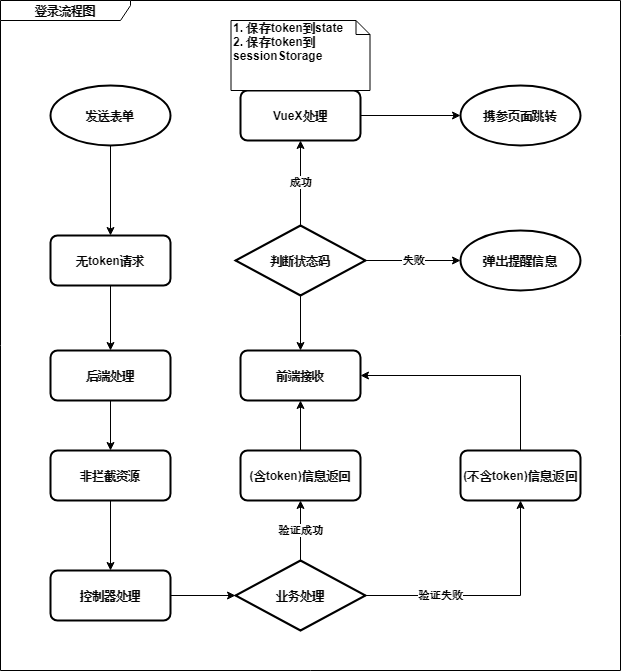
在服务器验证成功后,调用 login 方法,取出响应数据里的 token 保存到 state 和 sessionStorage 中。
1
2
3
4
5
6
7
8
9
10
11
12
13
14
15
16
17
18
19
20
21
22
23
24
25
26
27
28
29
30
31
32
33
34
35
36
37
import { createStore } from 'vuex' export default createStore({ state : { user : { token : window .sessionStorage.getItem('user' ) == null ? null : window .sessionStorage.getItem('user' ) } }, getters : { }, mutations : { login (state, token) { state.user.token = token; window .sessionStorage.setItem('user' , token); }, exit (state) { state.user.token = null ; window .sessionStorage.removeItem('user' ); } }, actions : { }, modules : { } })
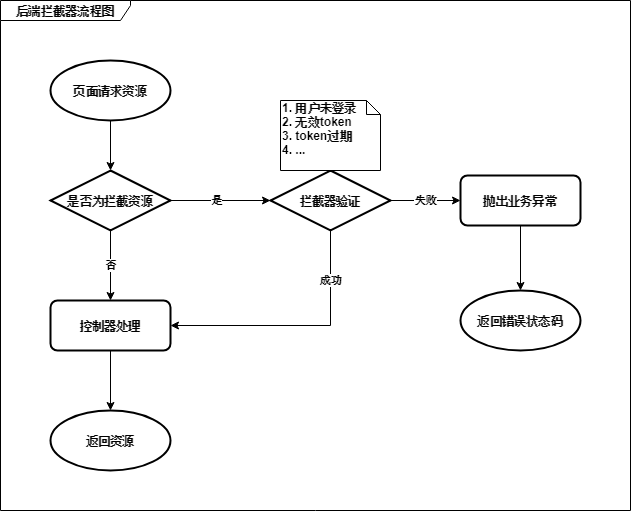
后端实现 后端拦截器流程图
拦截器代码实现
文件路径:config/interceptor/JwtInterceptor.java
自定义业务和系统异常,若是 token 不合法,则将状态码和错误信息返回给前端。
1
2
3
4
5
6
7
8
9
10
11
12
13
14
15
16
17
18
19
20
21
22
23
24
25
26
27
28
29
30
31
32
33
34
35
36
37
38
39
40
41
42
43
44
45
46
47
48
public class JwtInterceptor implements HandlerInterceptor @Resource private UserService userService; @Override public boolean preHandle (HttpServletRequest request, HttpServletResponse response, Object handler) throws Exception { String token = request.getHeader(Consts.TOKEN); if (!(handler instanceof HandlerMethod)) { return true ; } if (StrUtil.isBlank(token)) { throw new BusinessException(Code.NOT_LOGIN_ERR, "用户未登录" ); } String userId = null ; try { userId = JWT.decode(token).getAudience().get(0 ); } catch (JWTDecodeException j) { throw new BusinessException(Code.NOT_LOGIN_ERR, "Token令牌验证失败" ); } User user = userService.getUserByAccount(userId); if (user == null ) { throw new BusinessException(Code.NOT_LOGIN_ERR, "用户不存在,请重新登录" ); } JWTVerifier jwtVerifier = JWT.require(Algorithm.HMAC256(user.getPassword())).build(); try { jwtVerifier.verify(token); } catch (JWTVerificationException e) { throw new SystemException(Code.NOT_LOGIN_ERR, "登录超时" ); } return true ; } }
注册拦截器
文件路径:config/WebMvcConfig.java
每个请求服务器资源的请求都将先通过拦截器。这个文件就是注册所有拦截器的文件。
1
2
3
4
5
6
7
8
9
10
11
12
13
14
15
16
17
18
19
20
21
22
23
24
25
26
27
28
29
30
31
32
33
34
35
36
37
38
@Configuration public class WebMvcConfig implements WebMvcConfigurer @Override public void addCorsMappings (CorsRegistry registry) { registry.addMapping("/**" ) .allowCredentials(true ) .allowedOriginPatterns("*" ) .allowedMethods(new String[]{"GET" , "POST" , "PUT" , "DELETE" }) .allowedHeaders("*" ) .exposedHeaders("*" ); } @Override public void addInterceptors (InterceptorRegistry registry) { registry.addInterceptor(jwtInterceptor()) .addPathPatterns("/**" ) .excludePathPatterns("/users/login" , "/users/register" ); } @Bean public JwtInterceptor jwtInterceptor () { return new JwtInterceptor(); } }
生成 token 令牌工具类
文件路径:utils/TokenUtils.java
通过 JTW 生成 token,封装成工具类。
当调用登录业务时,用 TokenUtils.getToken(user.getAccount(), user.getPassword()); 生成 token 令牌。
1
2
3
4
5
6
7
8
9
10
11
12
13
14
15
16
17
18
19
20
21
22
23
24
25
26
27
28
29
30
31
@Component public class TokenUtils private static UserService STATIC_USER_SERVICE; @Resource private UserService userService; @PostConstruct public void setStaticUserService () { STATIC_USER_SERVICE = userService; } public static String getToken (String userId, String sign) { return JWT.create().withAudience(userId) .withExpiresAt(DateUtil.offsetMinute(new Date(), Consts.TOKEN_TIME)) .sign(Algorithm.HMAC256(sign)); } }
完整的登录流程图
未解决问题
输入有效但被拦截的 URL 时,地址栏会直接重定向到”/404“,而不是显示用户输入的 URL。 因为跳转有效 URL 时,要经过路由守卫,而路由守卫跳转都会重定向 URL。
📌最后:希望本文能够给您提供帮助,文章中有不懂或不正确的地方,请在下方评论区💬留言!
